Sunday, 15 October 2017

Game Gear LCD Screen Mod (McWill)


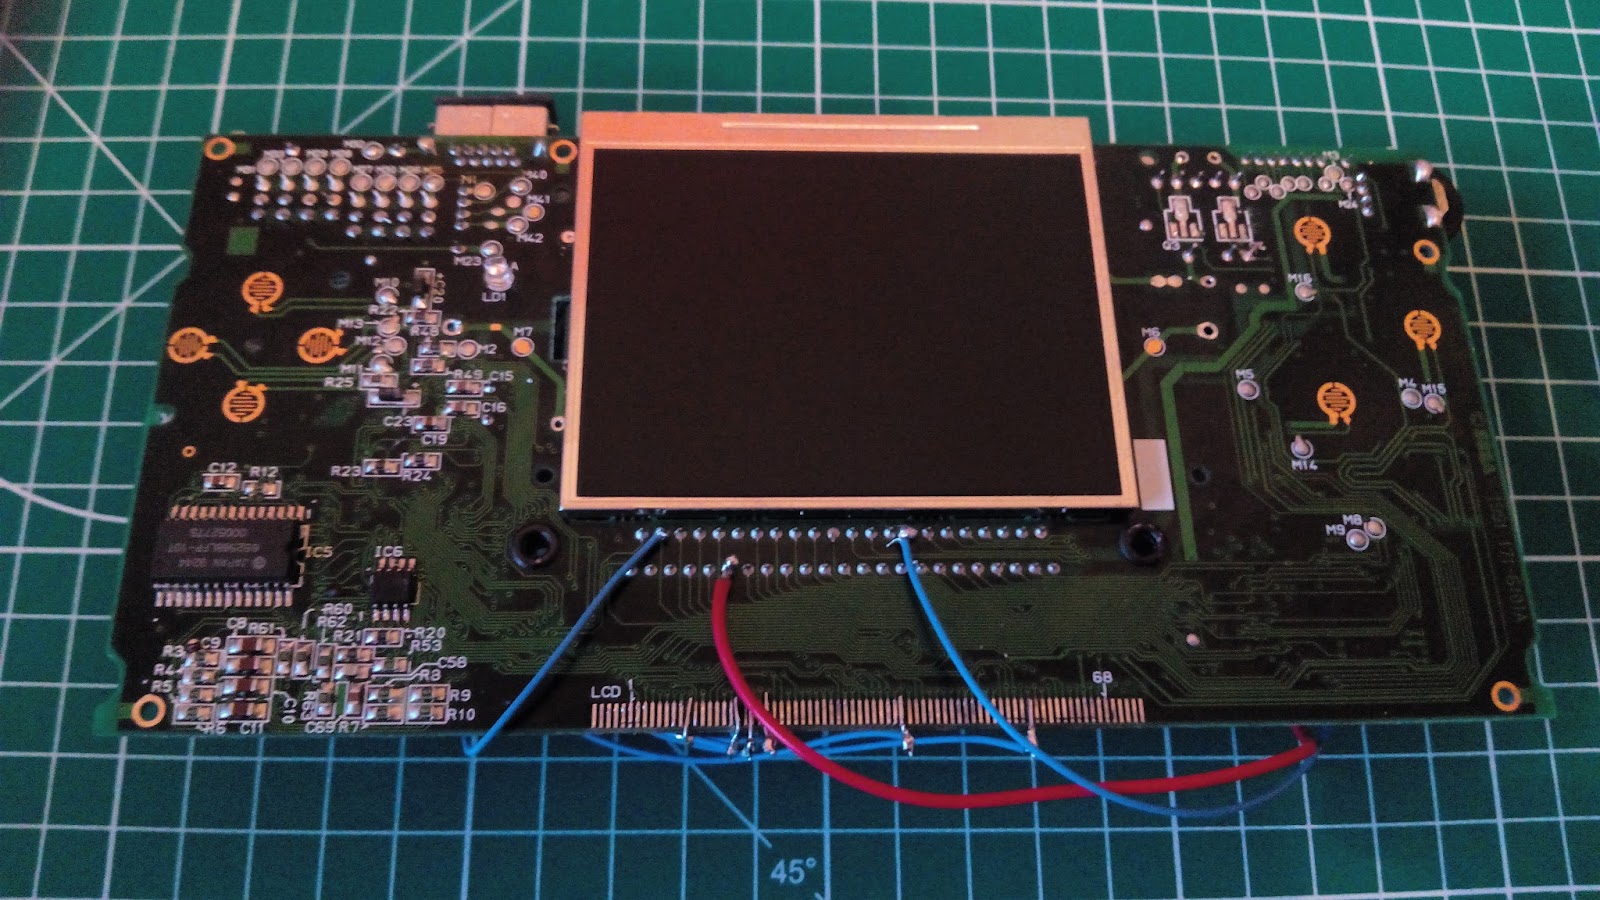
Well I finally got finished with the LCD mod. I would rate this as a tough one. Many tricky steps in the mod. From de-soldering tiny surface mount components to soldering the connections to the old LCD ribbon cable pads.No doubt this one was hard.
-----------------------  

-----------------------
I had some trouble tinning the ground solder point on the LCD mod. After scraping the solder pad with my sharpest tweezers, cleaning & adding some flux I was finally able to get the solder to take. It didn't help that a component ( don't know what one) was drawing the heat away. With allot of patience and more then a few tries I got it done.
-----------------------
-----------------------
I used AWG 26 wire for all the data lines. I used AWG 22 for VCC 5V and AWG 26for GND. I highly recommend using AWG 26 – 28 for this mod. It's just not going to happen with larger wire gauges.
-----------------------

-----------------------
Double check all your solder joints when your done. Looking for shorts or cold  joints. Clean the entire board with IPA as you go along. The last thing you need is a small bit of shrapnel or dust from your soldering work causing a short. I had one on the old ribbon connection. After rewiring the data lines to the screen twice, I noticed a very tiny bridge from some shrapnel and dry flux across two pads. I was barley able to see it at first and had been freaking out that I had broken the new screen.
-----------------------

After all desoldering & a cleanup with IPA
-----------------------
On the last attempt at soldering the LCD ribbon points, I discovered a neat way of soldering the data lines. I never bin the ends of leads from new caps or resistors. I always put the small bits I trim off into a little plastic container. If you rap your wire around an old lead making a T and solder the junction, then cut off one side of the T, you'll have L shaped end that's a perfect fit for these tiny solder points. You can hook them around the board and solder them on . It's still tricky but not as tricky as with just wire. This trick was a life saver but I still had to strain my eyes and take my time making sure I was soldering to the right pad. ( think I might have seen Ben Heck doing this in one of his videos).
-----------------------
Old ribbon solder pads trick.
  -----------------------
 finished wiring (front)
-----------------------
finished wiring (back)
-----------------------
2mm  Neoprene Seal strip for the LCD Screen
-----------------------
Reassembled GG
-----------------------
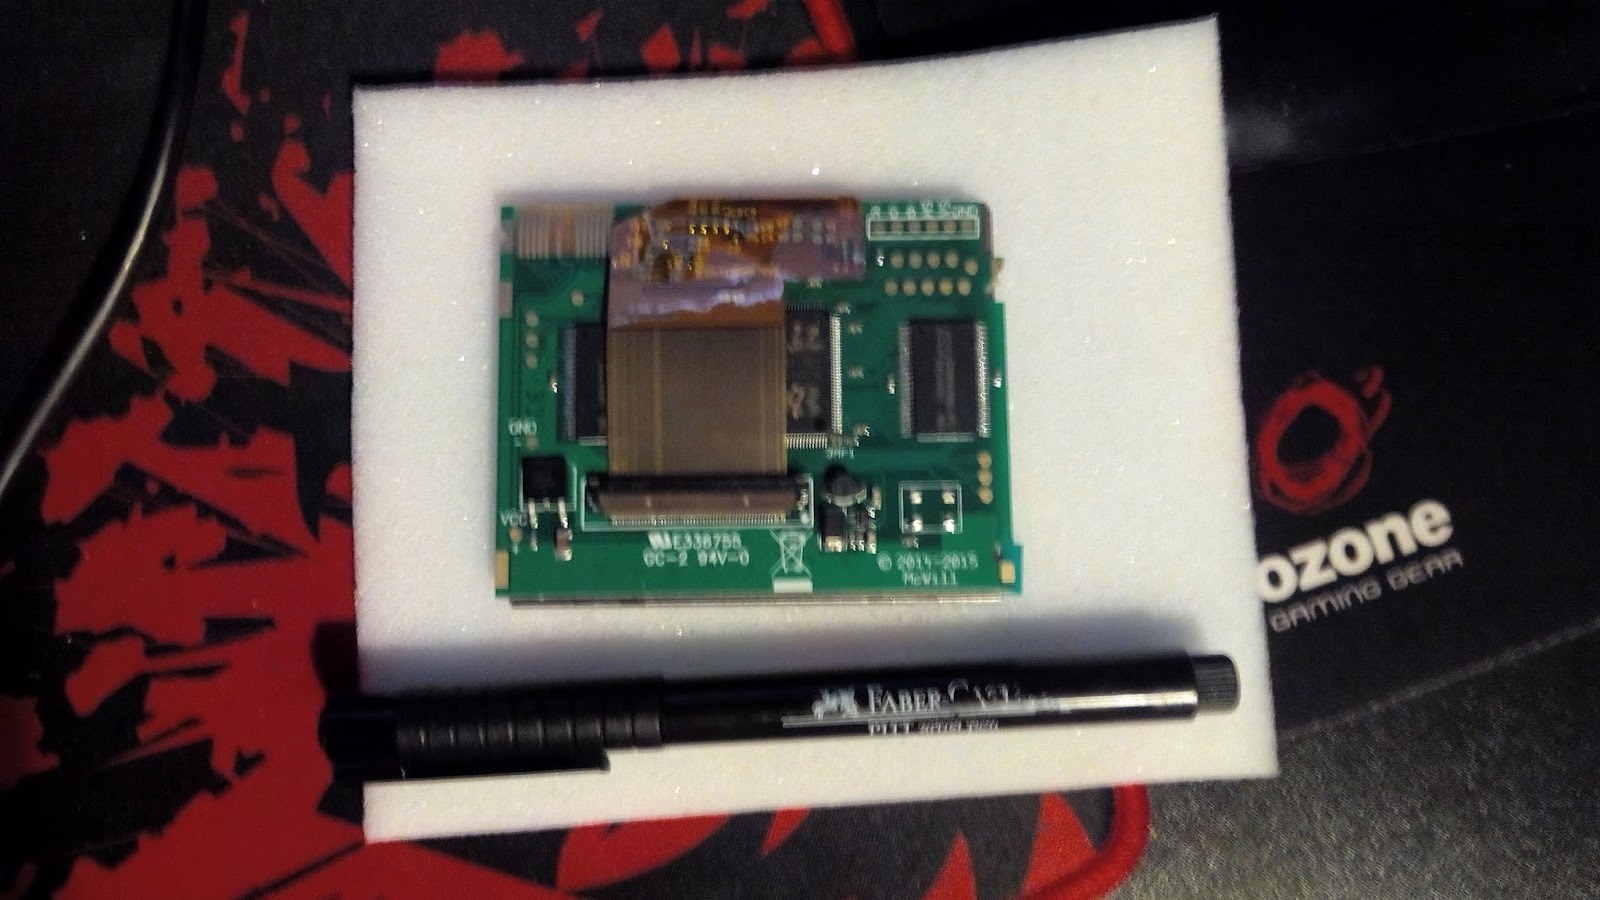
The difference between the old screen and the new one is like night and day. McWill's LCD Mod is a great bit of Kit. I''ll be holding on to both the modified and the original Game Gear consoles. In the end I didn't do the VGA out. If I want to play on a bigger screen then I'll just use an emulator. I have enough spare parts left however, to fix up a few more Game Gears. These fixed consoles I'll sell to help cover the cost of my next project and perhaps get an Everdrive GG. So I'll be keeping an eye open for some old Game Gears that need a bit of TLC and new home. 
-----------------------
 Old ( VA1 1xASIC )
-----------------------
New ( VA0 2xASIC )
-----------------------  

This was by far the most difficult project I've taken on to date. I learnt allot from it and feel more confident with my soldering. I'm already hatching plans for my next electronics project around Christmas. For now It's time to get back to work. Alas, my short holiday is over. I sort of feel like I'm becoming a shelter for old and abused consoles & computers. If your into retro console and computers, then it helps if your able to use a soldering iron and a multimeter. Curating these awesome devices and trouble shooting the problems that develop with old age, gives you a new found admiration for them. Ensuring that they continue to work and play games for years to come. Till next time.
-----------------------
-----------------------
A big thanks to the following youtubers for their great videos on the Game Gear and the McWill GG LCD mod. Great help in doing the mod.

StigsWorld has some great videos on repairing the Game Gear


GadgetUK164 has a great videos on the McWill LCD Mod


Terence Chan also has a great video covering McWill LCD Mod +VGA


SMSPOWER.ORG had loads of great info on their forums.

Thanks to everyone for their help!!!

I purchased my McWill LCD MOD from DragonBox. I have no trouble in recommending them, fast dispatch and a fair price. I also picked up a capacitor kit and GG screen cover/glass. They also offer mod installation and repair  services, so if your not comfortable with the soldering work I'm sure they'll help you out.

Friday, 6 October 2017

Sega Game Gear audio amplifier fix

So after recaping the faulty Gamegear, I noticed that the sound on the first working console was very low. So i did a recap on the audio amplifier board.


Recaping this small audio board is not that easy. I de-soldered some of the caps. For most however, I got out my flush cutters and sniped them off the board. The base of the capacitors is a soft plastic. Once cut away you can snip the old leads. Cleaning the solder points with wick and contact cleaner after. If you don't have flush cutters then I wouldn't do it this way. 


I replaced the capacitors one by one. De-soldering and soldering one at a time on the main board. For the audio board I recommend removing all the caps first. It makes things a little bit easier as this is a small finicky board.


The LCD screen is on the way. Just got my tracking number for it so I should be starting the screen mod some time next week. For now I'm going to clean some of the games cartridges and play some childhood classics.

Thursday, 5 October 2017

Sega Game Gear Capacitor Replacement

It's Alive! Finished replacing all the capacitors on the main board of the Sega Game Gear. Went slow, adding flux and whicking the contacts clean. Making sure to use contact cleaner before soldering the new caps on.


The main board was OK. Didn't find it too difficult. The audio board however was allot harder. In the end I replaced only one cap on it. C7. This one fails most of the time & as the audio was working fine before recaping, I figured I'd get away with it. With more practice and a better way to hold the PCB in place when working on it,  I'll come back and do the others.

Cheers to StigsWorld for the great video covering recaping the Game Gear sound board.


Once the new Screen arrives I'll re-access which console is best to use for the mod. No blue smoke or pops so far, all's going good.


Tuesday, 3 October 2017

SEGA Game Gear Project - Recap & LCD mod

Been working hard recently, without any break since March. So I've decided to take the next week or so off  work. So in my spare time I've decided to work on another Console MOD. This time on a Sega Game Gear.


I picked up 3 Game Gears for a fare price from a nice chap, that just  arrived today with a bunch of games.

1 fully working

1 needs a recap ( mod candidate ?)
1 just for spares.

I'll be working on the one that needs the recap. Once I've done that and its working again, I'll move on to the the Mod. If the boards an early revision, VA1 or VA2 it should be suitable. From checking up the serial it looks fine.

LCD replacement Mod (mcwill)
McWill Game Gear LCD upgrade


Allot of people have done this mod, so I'll be following their video tutorials and examples.I'll make sure to post and accredit any I use.

This is a slightly more complex project. I'll be working with the removal of some surface mount components. So I'll have to practise this on some old network cards and broken pcb's I have knocking about. I've made up a bill of goods for the recap and once it arrives in the next day or so, I'll get started. 

Check out  GadgetUK164's video on the his mod on youtube.


Tuesday, 23 May 2017

Arduino Adventures – DC Buck Converters

My next electronic adventure is in the world of Arduino and the Atmel ATMega32 MPU . So I'm going to get the Arduino starter kit and work my way through the projects that come with it. Once I have a grasp of it. I'll solder up my own board for a project I've been hatching. 

So, first things first. I'll need to power my projects. Enter Buck Rogers.


Well,,,,,, no. Buck converters. I got a larger one with a display to power the breadboard phase. Once done I have some smaller ones to house with my projects.Linear voltage regulators would be cheaper but they have draw backs in efficiency and the amount of heat they dump.
 
 5.3V on the buck converter display but just 5V on the Fallout style Multimeter,
my digital one is dead.
The little guy on top will be gong into the project and then I'll keep the large one for the breadboard stuff.

Thinking about another console mod for my first AVR project. Control everything through an ATmega32, with a display and some mode selection buttons.

I got both the large and small  buck converters on Amazon for a fair price.

Sunday, 23 April 2017

Mega Drive Modification Region, PAL/NTSC & 10mhz Clock


Recently I decided to take on a console mod project in my spare time. So I got a new soldering iron and a Sega Mega Drive ( Japanese MD1 PAL). I like the Japanese model and I've been thinking about getting one for some time. Here's all the information and help I found online, with some plans and rough drawings I created to help me Mod the Mega Drive/Genesis.


NOTE: README

I wouldn't do this to your original console. If like me you still have the one you got all those years ago. Don't risk it your first time doing the mod. Pick one up online. There's a reason why you see so many FOR PARTS ONLY for sale. It's not a crazy hard mod but just don't risk butchering it. Once you got it down, it should be easy to mod your original, confidently and with more polished results.
ok now thats out of the way.

Big thanks to TheDamoMonster for his video tutorials. Had them on repeat,  waiting for all the components to arrive.
 

mmMonkey's helped allot too.


Sega Retro Also had loads of information and help with the different MD revisions.

Jack Burton not of "Big Trouble in little China" but of Boards.ie. Also did some mod work on his MD back in 2008. He's posted some good stuff.

My Mega Drive Mod Project Stuff

Waiting for the components to arrive gave me time to draw up some plans for the mod. 


Wire & Switch Layout


Strip Board 10mHz Clock


Strip Board / Vero Board 

Working with this stuff is easy, if you got the right components, tools and have planed ahead. You'll find loads of info online, allot of it's not very useful. Opinions vary allot creating noise on allot of forums.

Louis Dratwa over at Nuts and Volts has a good article " The lost Art of Strip Board Prototyping " . It cuts through allot of the noise and dishes up the basics.

For more general electronics advice and info I highly recommend EEV Blog, by  Dave Jones on youtube.  Also check out The Ben Heck Show from Element 14. You'd be surprised what you can learn by osmosis. I have these on playlists, so I can put them on as I do the more mundane tasks, that don't require much concentration at work.

For a hobbyist / moder you'll find nearly every thing you need to know online eventually. As always, be willing to search for a bit.

Blue Reset Button

Looking for a Blue Reset Button for a Japanese Mega Drive? Look no further. Thingiverse has got you covered. Now all you need to do is get one printed.


Mega Drive Schematics

Thanks to http://gamesx.com and http://www.sega-16.com


Before 


After 


7Mhz Clock


10Mhz Clock


Address Jumpers & Switches


Not A great spot for the mod switches
( Gets in the way of the Mega CD attachment )  


SONIC - 60Hz NTSC & 10mhz Clock


RGB Scart Leads
RetroGamingCables.co.uk are simply the best after market cables around. Don't bother with E-bay or Amazon for these. Most of what you find will not fit. You'll find scart,power & controller bundles all over ebay and amazon. Many legitimate secondhand consoles will come with these. Expect a very cheap controller.  Knock off power supply and a scart lead that will not fit.

Get rid of the scart right away.You'll only damage the console as these do not fit ( at all). Don't plan on using the DC power adaptor for very long. Best to get rid of this cheap fake and replace it with a Universal Power Adaptor (UPA) or an original Mega Drive power adaptor if you can find one.

Retro Gaming Cables do a great job.  I wouldn't go any where else.Take your time and do some research into the variable voltage UPA.